
In the last post, I introduced Buildroot, a tool for creating custom Linux images. I mentioned that Buildroot does not recommend manually crafting configuration files. Instead, they prefer that you use the menu system to configure. your builds. This ensures that all necessary dependencies are handled correctly. In the last post, I talked about what was required to work with Buildroot and why. In this post, I will guide you through the process of configuring Buildroot to create a simple Bash-only image using the menu system.
Preparing the environment
This assumes that you’ve done a few things already that I covered in the last post:
- Configured your runtime environment. If you want to use a Dev Container, you can use this Dockerfile to set up your development environment:
1FROM ubuntu:24.04 2 3RUN DEBIAN_FRONTEND=noninteractive apt-get update -qqq && \ 4 DEBIAN_FRONTEND=noninteractive apt-get install -qq -y bash bc binutils build-essential bzip2 cpio diffutils \ 5 file g++-14 gcc-14 gzip make patch perl rsync sed tar unzip wget coreutils curl git libncurses5-dev python3 \ 6 software-properties-common libdevmapper-dev libsystemd-dev locales locales-all zip libgnutls28-dev libssl-dev \ 7 skopeo && \ 8 apt-get clean && \ 9 rm -rf /var/lib/apt/lists/* 10 11ENV LANG=en_US.UTF-8 12ENV LANGUAGE=en_US:en - Copied Buildroot or configured it as a Git submodule
- Created and configured a source directory for your project code (for this example, we’ll use
source/) - Ran
make BR2_EXTERNAL=${PWD}/source/ -C buildroot O=${PWD}/output/ qemu_x86_64_defconfigto create an initial configuration targeting an AMD/Intel architecture.
Configuring with menus
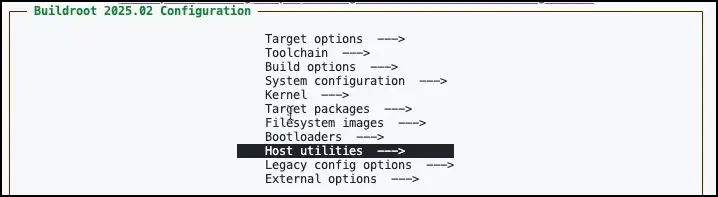
With the environment set up, you can start the menu system by running make -C output nconfig. This will open the main menu interface:
With Target options selected, press Enter (or Return on macOS) to edit the target. Press the down arrow key to select Target Architecture Variant.
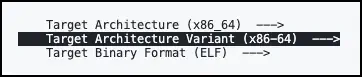
If it is not currently configured as x86-64, press Enter to edit the variant. Use the arrow keys to select x86-64 variant and press Enter. Press Esc to return to the main menu.

For now, we’ll ignore the toolchain. This lets you configure which kernel headers to use, the version of GCC, whether to enable C++ support, and several other options for the compiler toolchain. The defaults for Buildroot 2025.02 are the 6.12x headers, binutils 2.43.1, and GCC 13.x with C++ support disabled.
Press the down arrow to select Build Options and press Enter. This lets you configure some of the options for how your environment will be built. Using the arrow keys, select Enable compiler cache and press Enter (or Space) to enable it. This helps to speed up the build process. Next scroll down to select Advanced —> and press Enter.
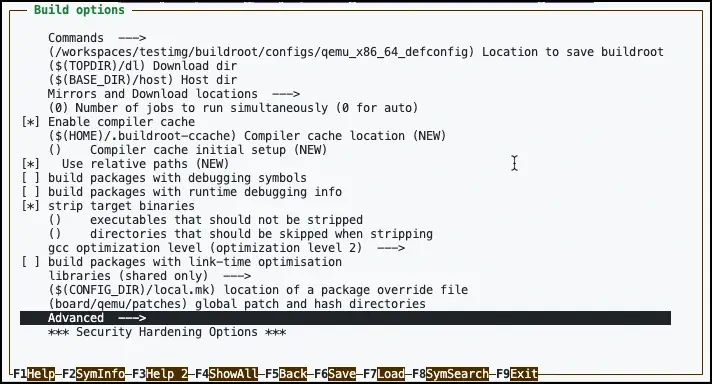
In the Advanced options, use the arrow keys to select Use per-package directories (experimental) and press Enter to enable it. This turns on an experimental feature that allows you to build packages in their own directories. This also helps to speed up the build process.

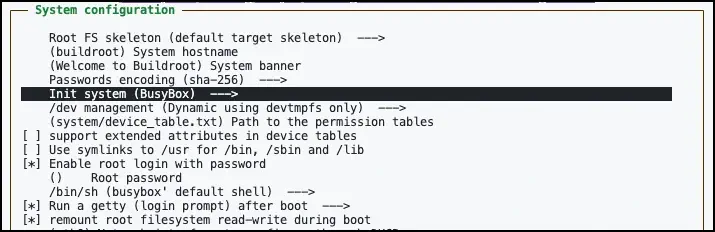
Press Esc twice to return to the main menu. Now, select System configuration and press Enter. Select Init System (BusyBox) and press Enter.
Now use the arrow keys to select Custom (none) and press Enter.
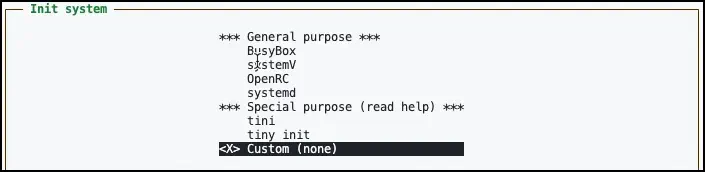
This disables the init system, which helps to minimize this image. Of course, if you needed an init system, you could select one of the other options. Press Esc to return to the main menu.
Now you will start to configure your shell, Bash. Select /bin/sh (busybox’ default shell) and press Enter.

Notice the message that Bash (and others) require the package BR2_PACKAGE_BUSYBOX_SHOW_OTHERS to be enabled. In many cases, you will not see guidance like this. Instead, Buildroot will normally hide menu options that are not available in the current configuration. In this case, it’s instead letting you know what is necessary to see the other options.
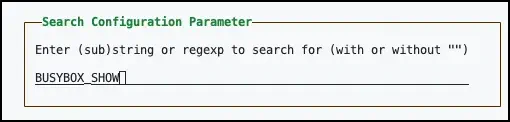
To find a package, use F8 to open the search. Next, type part of the package name. In this case, type BUSYBOX_SHOW and press Enter.
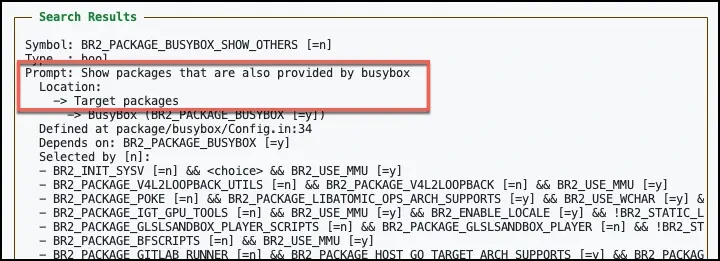
If you review the search results, you can see the location of that package is in Target packages. You can also see the name of the prompt – Show packages that are also provided by Busybox. Below that, you can see a list of packages that would automatically enable this option if they were selected. Now that you know where it is, you can navigate to it.
Press Enter to close the search results, then press Esc twice to return back to the main menu. Select Target packages and press Enter. This menu lets you select the packages to “install” (or more accurately, to build) as part of your image. Use the arrow keys to navigate to Show packages that are also provided by busybox and press Enter.

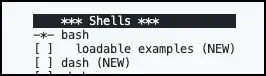
While we’re on this screen, scroll down to Shell and utilities and press Enter. Select bash and press Enter. This will build Bash and include it in the image.

Press Esc twice to return to the main menu and select System configuration again. This time, you are able to select bash as the shell and press Enter. Then press Esc to return to the main menu.

This is part of why they recommend you use the menu system. As you work through the menus, Buildroot will automatically add the necessary dependencies and packages to your configuration. It also shows and hides options based on what is available in the current configuration. In other words, it helps you avoid making mistakes that could lead to a broken image by always ensuring that the right packages are being included.
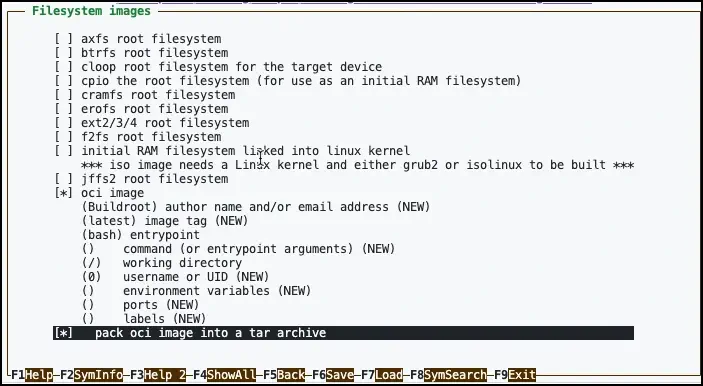
Now, you can configure the type of filesystem that will be created to hold your compiled image. Select Filesystem images and press Enter. Use the arrow keys to select ext2/3/4 root filesystem and Enter to disable it. Then select oci image instead. Now, underneath that, select (latest) image tag and press Enter. Change this value to myimage and press Enter. Next, select entrypoint and press Enter to change the setting to bash. You can also change the working directory to / by editing the Working directory field. Finally, choose pack OCI image into a tar archive and press Enter to enable it.
Press Esc to return to the main menu.
The kernel
Normally, Buildroot is used to build a complete Linux image, including the kernel. However, in this case, you are only interested in creating a minimal image that includes Bash and the necessary libraries. You can skip building the kernel by selecting Kernel from the main menu and pressing Enter. You will see the kernel configuration options.
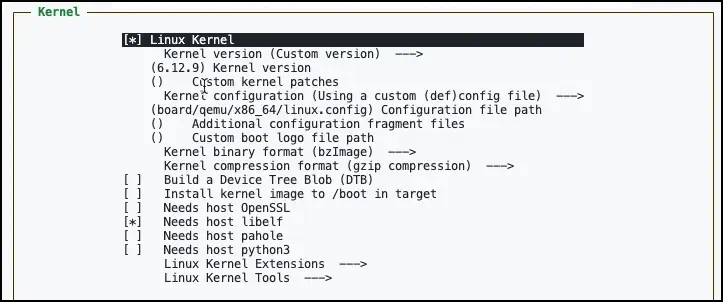
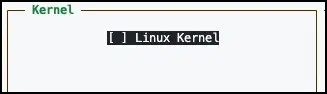
Use the arrow keys to highlight Linux Kernel and press Enter to unselect it. Press Esc to return to the main menu.
This removes the Linux kernel from the build process, eliminating the need to compile it. It also removes all of the related files and binaries that would normally be included, further shrinking the size of the image.
Removing unnecessary scripts
Since you are not building a complete image, you can also remove some of the scripts that are used to support the kernel in QEMU. In Build options – just above Advanced – you will see the global path and hash directories is set to board/qemu/batches.

Select the option, press Enter to edit it, then delete the contents and press Enter.
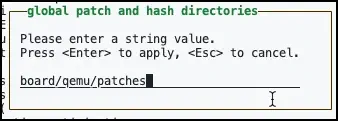
These files allow Buildroot to apply patches to the code based on the target environment.

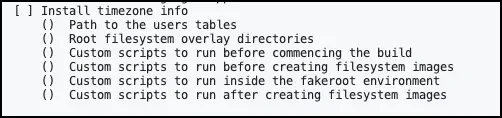
Press Esc to return to the main menu and choose System configuration again. At the bottom, you will see two custom scripts selected to run.
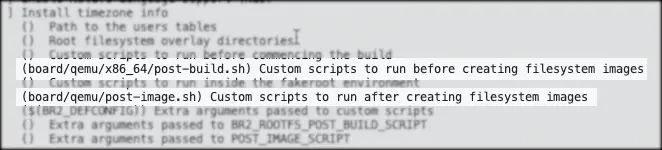
Edit each of these to remove the contents, then press Esc to return to the main menu.
Host utilities
There’s one last step we need to consider. By default, Buildroot automatically compiles a toolchain for building the packages and file system. It relies on the host system to provide some baseline tools to do that. As part of that process, it can compile additional tools that the host may need to build the image. These are called host utilities. In our case, the selections we’ve made so far assume that the host system has several tools (such as bc, cpio, gcc, make, and tar). To build the OCI image, it also relies on sloci. While we could install that on the host system, it’s often desirable to add these packages to the Buildroot toolchain. This helps to isolate the build from the host system and it ensures that any cross-compilation is properly handled.
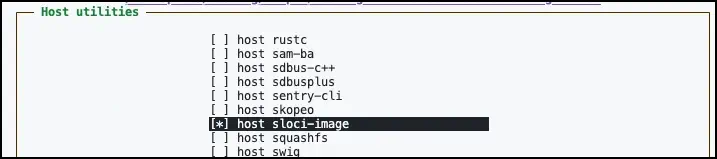
Select Host utilities and press Enter.
Use the arrow keys to select host sloci-image and press Enter to enable it. This will ensure that the sloci tool is built as part of the host utilities.
If you want to slightly improve the build time, you can also disable host e2fsprogs, host kmod, host qemu, and host util-linux if they are enabled. These are not required to build the image, so they can be safely removed. Use the arrow keys to select each of these options and press Enter to disable them.
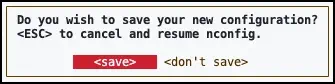
Press Esc to return to the main menu. Next, press Esc again to return to the terminal and exit the menu system. You will be prompted to save the configuration. Press Enter to save the configuration. Finally, press Enter again to acknowledge the save was successful.
Running the build
Now that the configuration is saved, you can build the image. Run the following command to build the environment:
1make -C output -j`nproc`This process will take anywhere from a few minutes to an hour, depending on your system’s performance and the number of cores available. The process runs in two phases. First, it will build the compiler toolchain and any host utilities. Creating a toolchain requires downloading and compiling a lot of code, so this is the most time-consuming part of the process. Once the toolchain is built, it will then compile the packages and create the image based on your configuration. For this configuration, that will likely require only a minute or two. Since the toolchain is cached, subsequent builds will be much faster, especially if you use the ccache option we enabled earlier.
Once the process completes, you will be able to find the generated OCI image in the output/images directory. The image will be named rootfs-oci-myimage-amd64-linux.oci-image.tar. The image will be under 4MB in size – quite minimal!
Testing the configuration
If you want to test the configuration and have Docker available, you can install Skopeo. This tool has several useful features, including the ability to copy OCI images to registries or directly to the Docker daemon.
Of course, you can also push the image to a registry and then pull it into Docker. To try this locally, you can start a container with a Docker registry on your local machine:
1docker run -d --name registry -p 5000:5000 registry:2Then, you can push the image to the local registry and use Docker to pull it from there:
Storing the configuration
Now that you have a working configuration, you can save it as a configuration file. This allows you to easily recreate the same environment in the future without having to go through the menu system again. It also saves a minimized configuration file, removing all of the default settings that Buildroot includes. This helps to keep the configuration file small and focused on the specific settings you need for your project.
Run the following command:
This creates a configs directory to store your custom configuration files. Buildroot will look in this directory to discover additional configurations that can be used. Now, any time you want to recreate this environment, you can run the following command:
1make BR2_EXTERNAL=${PWD}/source/ -C buildroot O=${PWD}/output/ oci_x86_64_defconfigThis will create a configuration that looks similar to this:
 1BR2_x86_64=y
 2BR2_CCACHE=y
 3BR2_DOWNLOAD_FORCE_CHECK_HASHES=y
 4BR2_PER_PACKAGE_DIRECTORIES=y
 5BR2_INIT_NONE=y
 6BR2_SYSTEM_BIN_SH_BASH=y
 7BR2_SYSTEM_DHCP="eth0"
 8BR2_PACKAGE_BUSYBOX_SHOW_OTHERS=y
 9BR2_PACKAGE_URANDOM_SCRIPTS=y
10BR2_TARGET_ROOTFS_OCI=y
11BR2_TARGET_ROOTFS_OCI_TAG="myimage"
12BR2_TARGET_ROOTFS_OCI_ENTRYPOINT="bash"
13BR2_TARGET_ROOTFS_OCI_WORKDIR="/"
14BR2_TARGET_ROOTFS_OCI_ARCHIVE=y
15# BR2_TARGET_ROOTFS_TAR is not set
16BR2_PACKAGE_HOST_SLOCI_IMAGE=y
This is substantially smaller that the .config in your output directory. It only includes the settings that you changed from the defaults. This makes it easier to manage and share your configuration.
You may notice that this has two other options:
BR2_SYSTEM_DHCPBR2_PACKAGE_URANDOM_SCRIPTS
These support some of the Busybox packages. If you want to make it even smaller (under 3MB), you can also edit the Target packages and unselect BusyBox. This eliminates all of those binaries from the image. Buildroot will continue to include Bash, since it is the configured shell, but binaries such as ls will not be included.
Cleaning the environment
Because Buildroot has caches, you will sometimes need to explicitly clean the environment to ensure that changes are applied. For example, if you remove a package you will need to clean the environment to ensure that the package is removed from the build. This is because Buildroot caches the code and build artifacts, but it does not automatically clean them up when the configuration changes. To delete the build directories and toolchain, you can run the following command:
1make -C output cleanIf you change the build target, then you need to run a more complete clean-up to ensure that Buildroot generates appropriate files and binaries for the target architecture:
1make -C output distcleanBecause you selected the options to also use the compiler cache (ccache), Buildroot will store the object files in the BR2_CCACHE_DIR to speed up the build process. By default, this variable is set to $HOME/.buildroot-ccache. If you are making significant changes to configuration settings (or target architecture), you may want to delete this directory and remove the cached object files using rm -rf $HOME/.buildroot-ccache.
Next steps
As you can see, it’s not too difficult to configure Buildroot to create a custom image. The menu system makes it easy to navigate and find the options you need. It also makes sure the environment remains consistent. In some upcoming post, we’ll look at a few more features that can help you improve your experience with Buildroot. Until then, have fun crafting your images!