
It wasn’t always this way. In the past, creating a console application was a natural part of development that required no effort beyond compiling your code. Of course, times change and security practices have to adapt. With the release of the new generation of Silicon Macs, Apple is now requiring console applications downloaded from the internet to be properly notarized to run. If you want to make your console application available for download, then you should consider signing it.
It’s not strictly true that this is the only way to run console applications. Today’s post assumes you want to play by Apple’s rules and recommendations. Apple documents a
process for running applications that aren’t notarized. In addition, applications you build locally or do not download are exempt from this rule. Under the covers, macOS stores two attributes (com.apple.quarantine and com.apple.metadata:kMDItemWhereFroms) which identify the file as downloaded and potentially unsafe. This also tracks the soruce URL. It is possible to remove those attributes using xattr -r -d {attributeName} {filename}. Apple adds an attribute (com.apple.lastuseddate#PS) with a binary timestamp the first time the file is approved. This prevents future prompts about the safety of the file.
If we want to make an application available to download and run, we won’t be able to run it without prompts indicating that the developer has not been verified. To fix this problem, we will need three things:
- An Apple Developer account ( https://developer.apple.com). This requires a payment of $99/year.
- A developer certificate
- An app-specific password to prevent GUI prompts and allow the process to be automated
Acquiring a developer certificate
Once you have registered for a Developer Account, you can choose Certificates, IDs & Profiles in the portal to create a new certificate (or, just open https://developer.apple.com/account/resources/certificates/add).
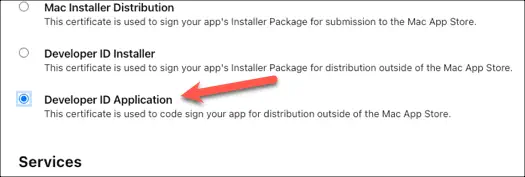
Choose Developer ID Application to get a certificate for signing the executable. Then press Continue (at the top of the page).
Choose the G2 Sub-CA (Xcode 11.4.1 or later) profile type.
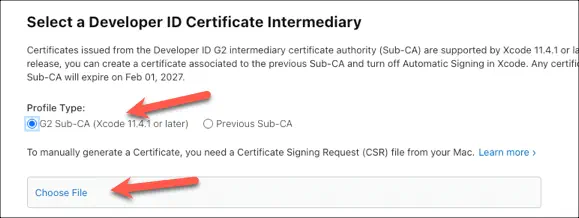
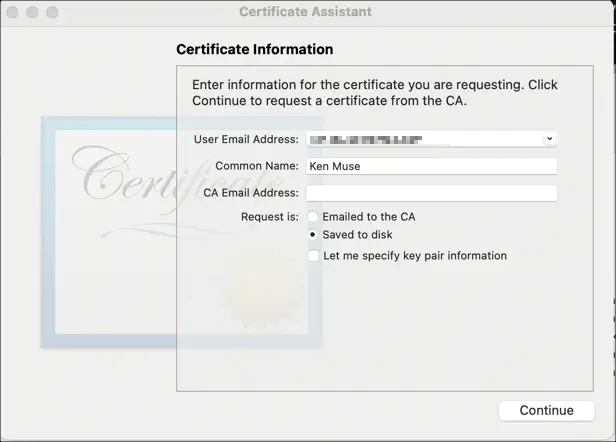
Follow the instructions here to create a certificate signing request and save it on your machine. You will then select and upload the generated file using Choose File. Click Continue
You will be taken to a page to download your new certificate. Click Download, then double-click the downloaded file to install it in your Keychain Access. This makes the certificate available on your machine.
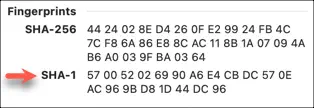
At this point, double-click the certificate in Keychain Access to view its properties. Scroll to the bottom and copy the SHA-1 hash located at the very bottom. This is the certificate’s “thumbprint”. It uniquely identifies the certificate. While multiple versions of a certificate can exist with the same name, a thumbprint will only match a single certificate. As a result, it can be a more secure approach to identifying the correct certificate to use.
Now we just need a way to authorize the signature programmatically.
App-specific passwords
Because the developer account will be using MFA to protect the identity, we need to get a unique password that will allow us to bypass the MFA. This allows us to perform the notarization without receiving a prompt. It’s important to understand that you should have one application per usage environment (so that they can be easily invalidated if one is compromised).
To create password, go to https://appleid.apple.com and sign in. Next, select App-Specific Passwords.
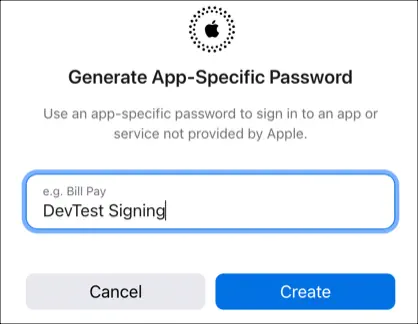
If you already have passwords, click the “+” icon. Otherwise, click Generate an app-specific password.

Name the app-specific password so that it’s clear where this is being used and the purpose. For example, “Local Signing” or “CI/CD Signing”. Click Create.
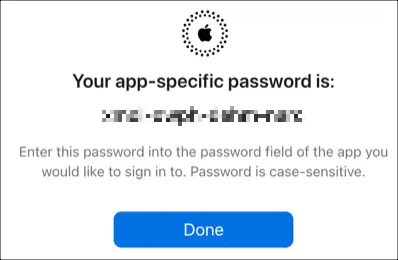
You will be asked to enter your password to authorize the request. Once that’s done, the app-specific password will be displayed. After you leave this screen, you will not see the password again. Any further requests would require creating a new password.
Using and securing credentials
Naturally, we don’t want to leave secure credentials just anywhere. We want to store those values securely to ensure they cannot be used for malicious purposes.
For CI/CD solutions (like GitHub Actions), you’ll want to place your credentials in Secrets to ensure that they are protected. You’ll want to store these values:
The certificate/private key. To store this as a string, you’ll need to convert the certificate and key to a
.p12file (detailed above), then use the following command to convert that to a base-64 encoded string:1base64 {path/to/exported-certificate.p12}The password for accessing the
.p12fileYour developer account’s Apple ID (typically and email address)
The app-specific password we created above
The “Team ID” for your credentials. This is the value in parentheses for the downloaded certificate. You can also retrieve this value from the Membership page in the Developer Account.
If you’re developing locally, the certificate is already stored securely in your Keychain. To secure the remaining values, you’ll need to create a notary profile. This will contain the Apple developer credentials, including the app-specific password. You’ll provide a name for the profile; this will let you access it in the future. For example, to create a profile called “MyCredentials”, use the following command:
1xcrun notarytool store-credentials "MyCredentials" --apple-id "youremail@domain.com" --password "xapp-spec-pass-word" --team-id "ABCDEF7HIJ"What about the Thumbprint (SHA-1) we retrieved earlier? We’ll come back to that one and how it’s used when we start code signing. For now, you can choose to store this as a secret for builds, or keep it handy for local development work.
Next steps
That was a lot for one post. Next week, we’ll walk through how we use these details to notarize our code. See you then!