
If you’ve been waiting for a way to build your own GitHub-hosted runner images, the public preview delivers exactly that. You can now use custom images on GitHub hosted runners that contain your favorite tools. In this guide we’ll walk through the end-to-end experience, highlight the places where the preview can surprise you, and sprinkle in a few tips from the field so you launch confidently. I’ll also show you how to add pre- and post-job scripts that prepare the machine before the first step and clean up after the job closes.
Why custom runner images matter
You probably may have experienced this: every workflow run installs the same tooling, downloads the same SDKs, and burns minutes before your first compile even begin. In some cases, this can also create egress from your cloud environment, increasing those costs. Custom images let you pre-bake those dependencies, trimming minutes off each build, and standardizing the toolset across your organization.
This preview isn’t just a clone of self-hosted runners. You’re still using GitHub’s infrastructure (VMs and networking), but you get significantly more control over what’s on the machine. GitHub’s official guidance outlines the new capabilities in the custom image documentation. Some potential use cases include:
- Blocking unexpected workflows before they start by using a pre-job script
- Caching tools or Actions on the runner so that they are available immediately
- Changing environment defaults
- Restricting or customizing network access
- Pre-installing security patches, compliance tools, or custom certificates
- Adding additional monitoring or security processes
- Caching very large repositories or datasets to speed up builds
- Caching known-good dependencies or OCI images to reduce supply chain risks, improve reliability, speed up builds, or reduce egress costs
Step 1: Build a larger hosted runner that can capture snapshots
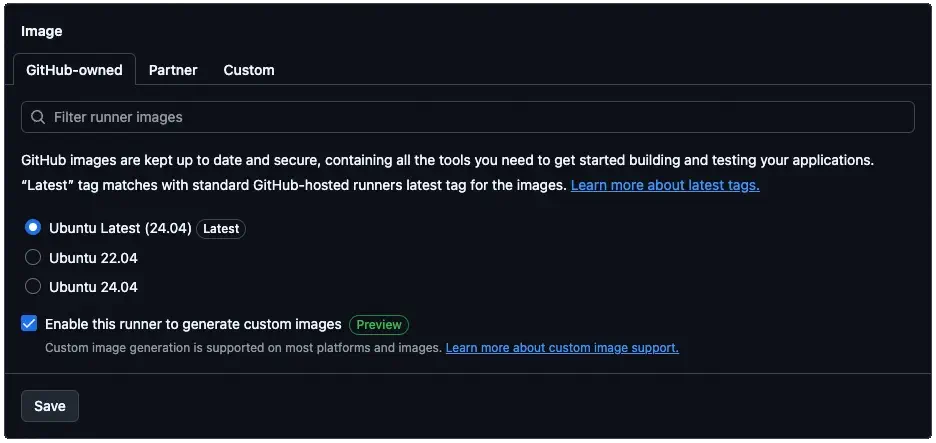
Start in your organization settings under Actions > Runners. Choose New runner, then select New GitHub-hosted runner. Pick the hardware size you want and give the runner a label (for example, larger-runner-demo). Be aware that the runner size you pick for the builds must be the same size as the runner you plan to run the custom image. If you’re using Linux, you’ll have two sets of base image options:
- GitHub-owned Ubuntu gives you the fully loaded image you already know from
ubuntu-24.04images, including languages, SDKs, and utilities. - Partner base images for Ubuntu in the partner catalog are slimmer builds designed to let you have more control over what goes into the image.
The key checkbox is Enable this runner to generate custom images. Without it, your workflow will finish successfully but no snapshot will ever appear or be listed on the Custom images tab. You won’t even see an error.
Step 2: Author the image-building workflow
Next, you need to create a workflow that runs on the new larger hosted runner and customizes the virtual machine.
- Create a workflow file (for example,
.github/workflows/custom-image.yml). - Set
runs-onto the label you assigned in Step 1 so the job schedules on the snapshot-capable runner. - Add a
snapshotblock with animage-nameand (optionally) aversionmajor number. - Use the job’s
stepslist to configure the machine exactly the way you want it captured. Install any dependencies, run hardening scripts, and clean up caches you don’t want baked into the snapshot.
Here’s a starter workflow you can drop into .github/workflows/custom-image.yml.
  1   name: Build custom runner image
  2
  3   on:
  4     workflow_dispatch:
  5     schedule:
  6       - cron: '0 9 * * 1'
  7
  8   jobs:
  9     bake-image:
 10       runs-on: larger-runner-demo
 11       timeout-minutes: 120
 12       snapshot:
 13         image-name: tools-lts
 14         version: 1.*
 15       steps:
 16         - name: Install additional tooling
 17           run: |
 18             sudo apt-get update
 19             sudo apt-get install -y yq graphviz
 20
 21         - name: Remove package cache
 22           run: sudo apt-get clean
The snapshot block tells GitHub to capture the VM after the final step succeeds. The catalog entry will be the image-name, and version provides the major version for the tag. GitHub auto-increments the minor segment every time you snapshot (sorry, no patch versions allowed!). You can also use the simple form (snapshot: tools-lts) to let GitHub handle versioning entirely.
Step 3: Add pre- and post-job scripts
If you’ve ever worked with self-hosted runners, then you may be aware you can run scripts before the first workflow step and after the final one finishes using job scripts. While they are running, they have access to the standard environment variables listed in the default environment variable reference. That means you can leverage those to make decisions or create configurations specific to the job immediately before it executes.
You’ll also find handy variables on the stock Ubuntu environments, including ACTIONS_RUNNER_ACTION_ARCHIVE_CACHE (the location of the Actions archive cache), AGENT_TOOLSDIRECTORY (which matches RUNNER_TOOL_CACHE and stores the location of the tool cache), ImageOS (such as ubuntu24), ImageVersion (the base image version, such as 20251112.124.1), and the USER account for the runner.
The steps for generating an image with these scripts:
- Place your hook scripts in a folder on the runner, for example
/opt/runner/pre-job.shand/opt/runner/post-job.sh. - Mark them executable with
chmod +x. - Register them by exporting two environment variables that the Actions runner reads at runtime. The easiest way to do that is to append them to
/etc/environment. This is a privileged file, so you’ll want to usesudo teeto write to it.
Here’s how this might look within a workflow:
  1   - name: Add pre-script
  2     run: |
  3       mkdir -p /opt/runner
  4       cat << EOF > /opt/runner/pre-script.sh
  5       #!/usr/bin/env bash
  6       echo '##### PRE SCRIPT #####'
  7       printenv
  8       EOF
  9       sudo chmod +x /opt/runner/pre-script.sh
 10       sudo tee -a /etc/environment > /dev/null << EOF
 11       ACTIONS_RUNNER_HOOK_JOB_STARTED=/opt/runner/pre-script.sh
 12       EOF
 13
 14   - name: Add post-script
 15     run: |
 16       cat << EOF > /opt/runner/post-script.sh
 17       #!/usr/bin/env bash
 18       echo '##### POST SCRIPT #####'
 19       printenv
 20       EOF
 21       sudo chmod +x /opt/runner/post-script.sh
 22       sudo tee -a /etc/environment > /dev/null << EOF
 23       ACTIONS_RUNNER_HOOK_JOB_COMPLETED=/opt/runner/post-script.sh
 24       EOF
Both hooks execute using the runner’s user account (typically runner). Remember that a non-zero return code or error in these scripts will fail the job. It’s also worth mentioning that the environment variables written to /etc/environment are available to the workflow’s shell for every job (in this case, as Bash environment variables such as $SOMEVAR). They are not included in the env context (per
ADR-0278) if you’re using expressions, such as ${{ env.SOME_VAR}}.
Step 4: Wait for the image to provision
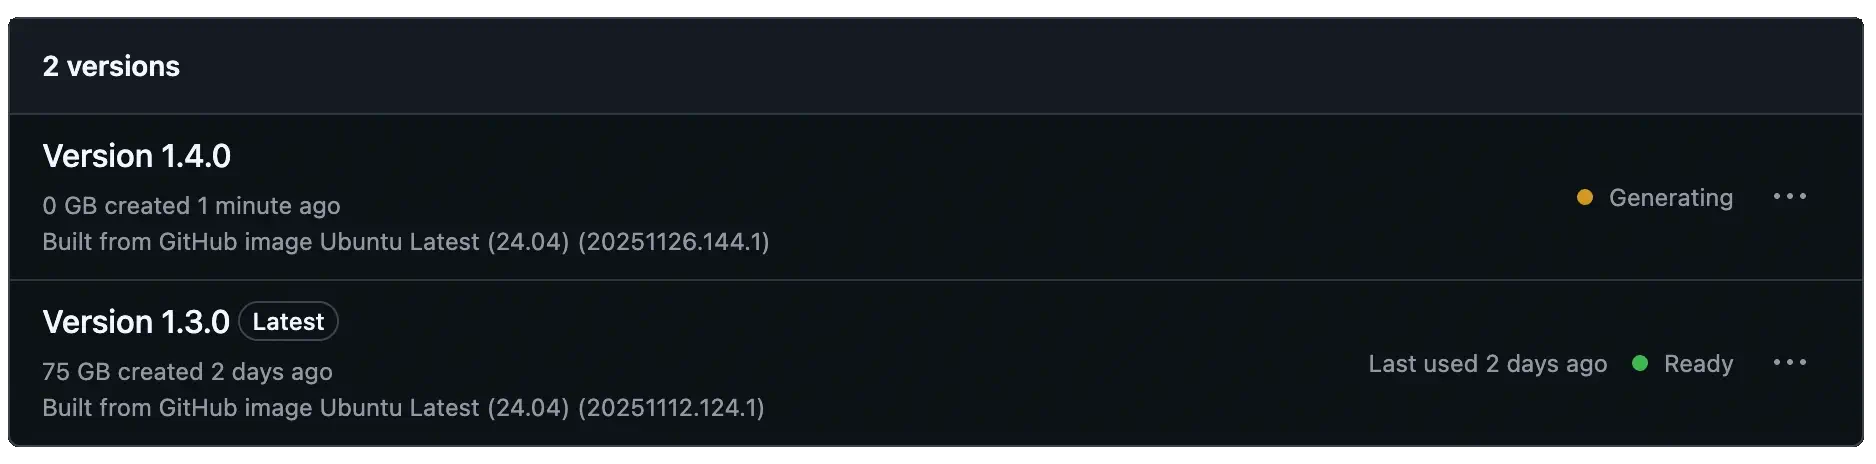
When the job completes, GitHub moves the snapshot through a few phases before it’s ready for reuse. These phases are visible in Organization settings > Actions > Runners > Custom images when you click on the image name.
- Generating
- GitHub captures the disk image immediately after your job finishes successfully.
- Provisioning
- The snapshot is copied, replicated to regions, and deployed to GitHub-hosted runners. You’ll see messages such as
Copying image,Provisioning image, andReplicating image to regionsin the UI. The full process normally takes 1-3 hours to complete. During this time, it will appear as an option in the runner configuration, but it won’t be usable until the provisioning is complete.
- Ready
- The entire process has finished and the image is full provisioned and ready for use.
Step 5: Consume the custom image in other runners
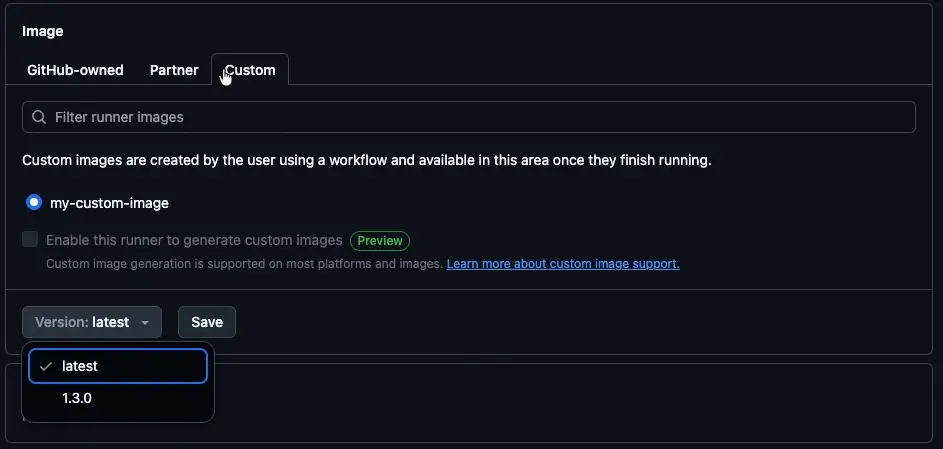
After your snapshot reaches the Ready state, you can use it to create your customized runner pool.
- Create another larger hosted runner from Actions > Runners > New GitHub-hosted runner.
- Switch to the Custom tab and select the image captured in Step 2.
- Choose a specific version or stick with
latestif you want GitHub to roll forward automatically as you publish images.
From there, using the image feels just like any other runner. Reference the runner label in runs-on and GitHub handles the rest.
If you’re using the pre- and post-job scripts, you’ll see the workflow executes similar to a custom runner:
- Set up job
- GitHub downloads and configures Actions, and it logs details about the image and its version under
VM Image
- Set up runner
- This step is executing your
ACTIONS_RUNNER_HOOK_JOB_STARTEDscript
- All of your job steps are executed
- Complete runner
- The
ACTIONS_RUNNER_HOOK_JOB_COMPLETEDscript runs to perform any cleanup.
- Complete job
- GitHub finalizes the job and kills any orphaned processes. The virtual machine shuts down and the contents of the disk are wiped.
The fine print
Custom images are powerful, but there are a few important things to keep in mind.
- This is a public preview and could change before general availability. I’m not expecting any changes, but that doesn’t mean they won’t happen.
- Larger hosted runners with custom images are billed at the usual per-minute rate every time your workflow runs. In addition, the custom image itself accrues storage charges for each version you keep. That means that you will want to define a lifecycle policy and delete older images that you no longer need.
- A snapshot is only compatible with the runner size that produced it. If you create the image on a 4-core Linux runner, every runner that uses that image must also be 4-core Linux machine.
- The storage footprint of the image matches the underlying runner. For example, a 2-core Linux runner offers 75 GB of storage, so each snapshot from that machine consumes 75 GB even if your customizations only use half the space. This is because VMs require storing the entire disk image.
Thanks for exploring the preview with me! Hope that you find this new capability as exciting as I do. Now you can secure your build environments and create more predictable, faster workflows by bottling up your best configurations into custom images.