
Application Insights is a powerful component of Azure. It provides us with real-time logging about the performance of our application, the reliability of the site, and any exceptions that might arise. It’s an important and often overlooked part of the DevOps lifecycle — monitoring the application in production.
New releases can introduce new issues. Whether its a new bug being exposed as part of the release or simply some latency issues during the rollout, it’s important to understand the relationship. Today’s post will explore how we can use VSTS to automatically add annotations to our Application Insights environment.
What’s an Annotation?
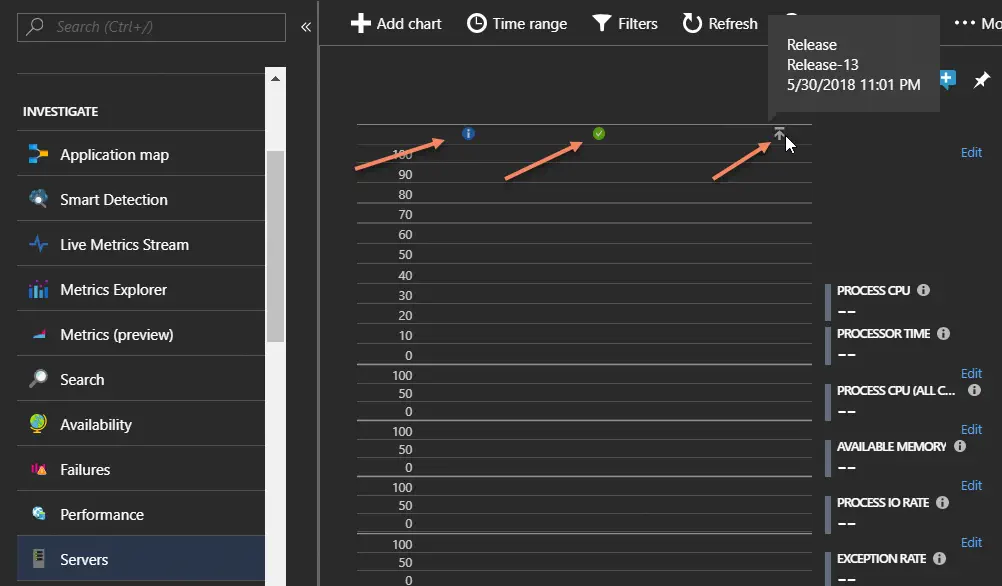
A release annotation creates a mark in Application Insights on the Metrics Explorer or Server charts that indicate significant events. These marks — alone with any related comments — are presented as icons that are visible at the top of the chart. Hovering over the icon will provide details about the particular annotation.
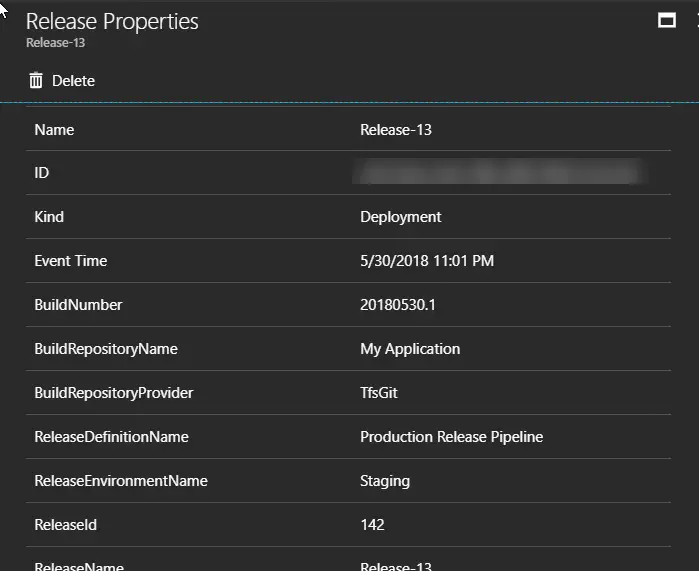
Annotations can be added to Application Insights manually or programatically. A typical annotation has 4 properties:
Event Time – The date and time the event occurred
Name – The name of the event
Comments – Additional descriptive text displayed beneath the name
Label – An icon indicating the specific type of event.
Clicking on an annotation will provide you additional details as a set of name-value pairs.
Getting Write Access
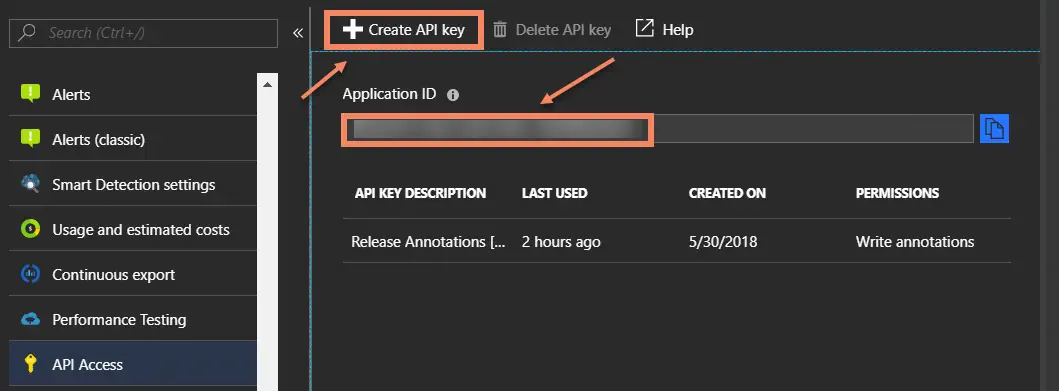
In order to create an annotation, we need to first get a key that grants us permission to write to the Application Insights instance. This requires us to have two values — the Application ID and an API key.
First, open the API Access blade. Make a note of the Application ID — you will need that Guid value later. Next, press the Create API Key button.
Provide a short description of the intended usage of the key and check Write Annotations. Then press Generate Key.
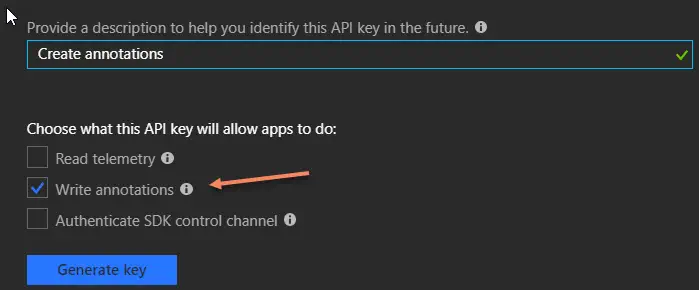
The API key will be displayed. Copy this value.
Annotating from PowerShell
To create a release annotation from PowerShell, you will need to download this script from Github. This script demonstrates how to connect to Application Insights to create annotations. It provides a function for creating custom annotations, along with retry logic and error handling. You can execute the script by passing in the Application ID, the API Key, a release name, and a set of name-value properties to be associated with the release. For example:
.\CreateReleaseAnnotation.ps1 `
      -applicationId "**Your Application ID**" `
      -apiKey "**Your API Key**" `
      -releaseName "Release-123" `
      -releaseProperties @{
          "ReleaseDescription"="The 123rd Release milestone";
          "BuildNumber"="Build 20180530.1" }
Easy enough!
And From VSTS…
While you can use the PowerShell script to create the annotation, it’s significantly easier to use a custom extension built specifically for this purpose. You’ll need to get the Release Annotations for Application Insights extension from the Visual Studio Marketplace. Follow the link above, then press Install to add the extension to your VSTS account. This extension makes a new release task available — Release Annotation

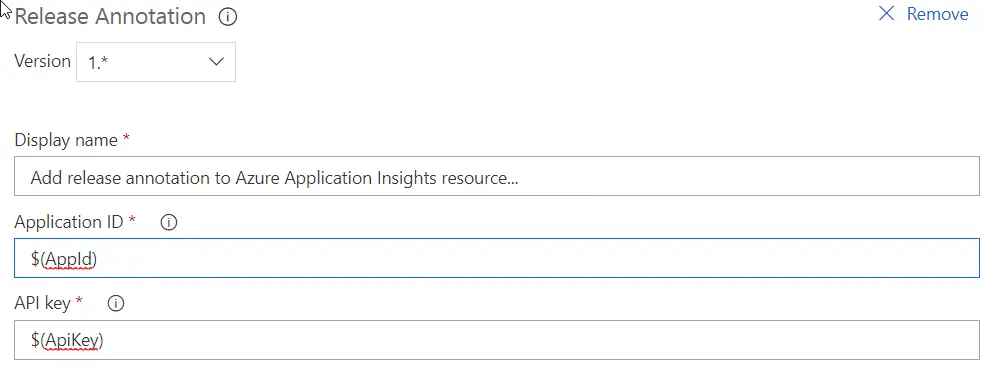
In your Release pipeline, click to add a Task to the Agent Phase. Select the Release Annotation task and press Add. Provide the Application ID and API key that you created in Application Insights.
As a best practice, we tend to make both of these variables. To do this, specify the Application ID as $(AppId) and the API key as $(ApiKey).
Then, open Variables and add two new variables with your Application ID and access key. For added security, press the icon beside the value to make the values secret.

That’s all there is to it. Your release process will now automatically add annotations to the related Application Insights instance each time a new release is created. This will give you visibility into your release deployments directly from inside Application Insights.
Happy DevOp’ing!